Domain purchase and forwarding to dynamic dns
• 2
minutes read time
• Paul Fearn![]()
I was going to complete this task using route53 but the domain forwarding doesn’t seem to be as simple as another domain provider that I’ve used in the past. Let’s see if I can flail my way through this process.
I’ve decided to use namecheap.com simply because I’ve used them before and they offer cheap domains (as the name suggests). I’m not affiliated with them in any way, and if you know of a better domain provider (and maybe cheaper?) then feel free to add it to the comments.
 namecheap.com
I went through this process and documented it before I bought the .net variant of my domain, some of these screenshots are for the .co.uk (that I just forgot that I own and should probably implement).
 searching for domain
Anyway, enter your domain in the search box and select the one you would like to purchase. I purchase mine on a year by year basis so I don’t have them auto renewing as I never know where it might be hosted next.
Fill in your details for the ownership and complete the purchase.
Now that you’ve completed the purchase, go to the domain list. and click the “manage” button.
 manage domain
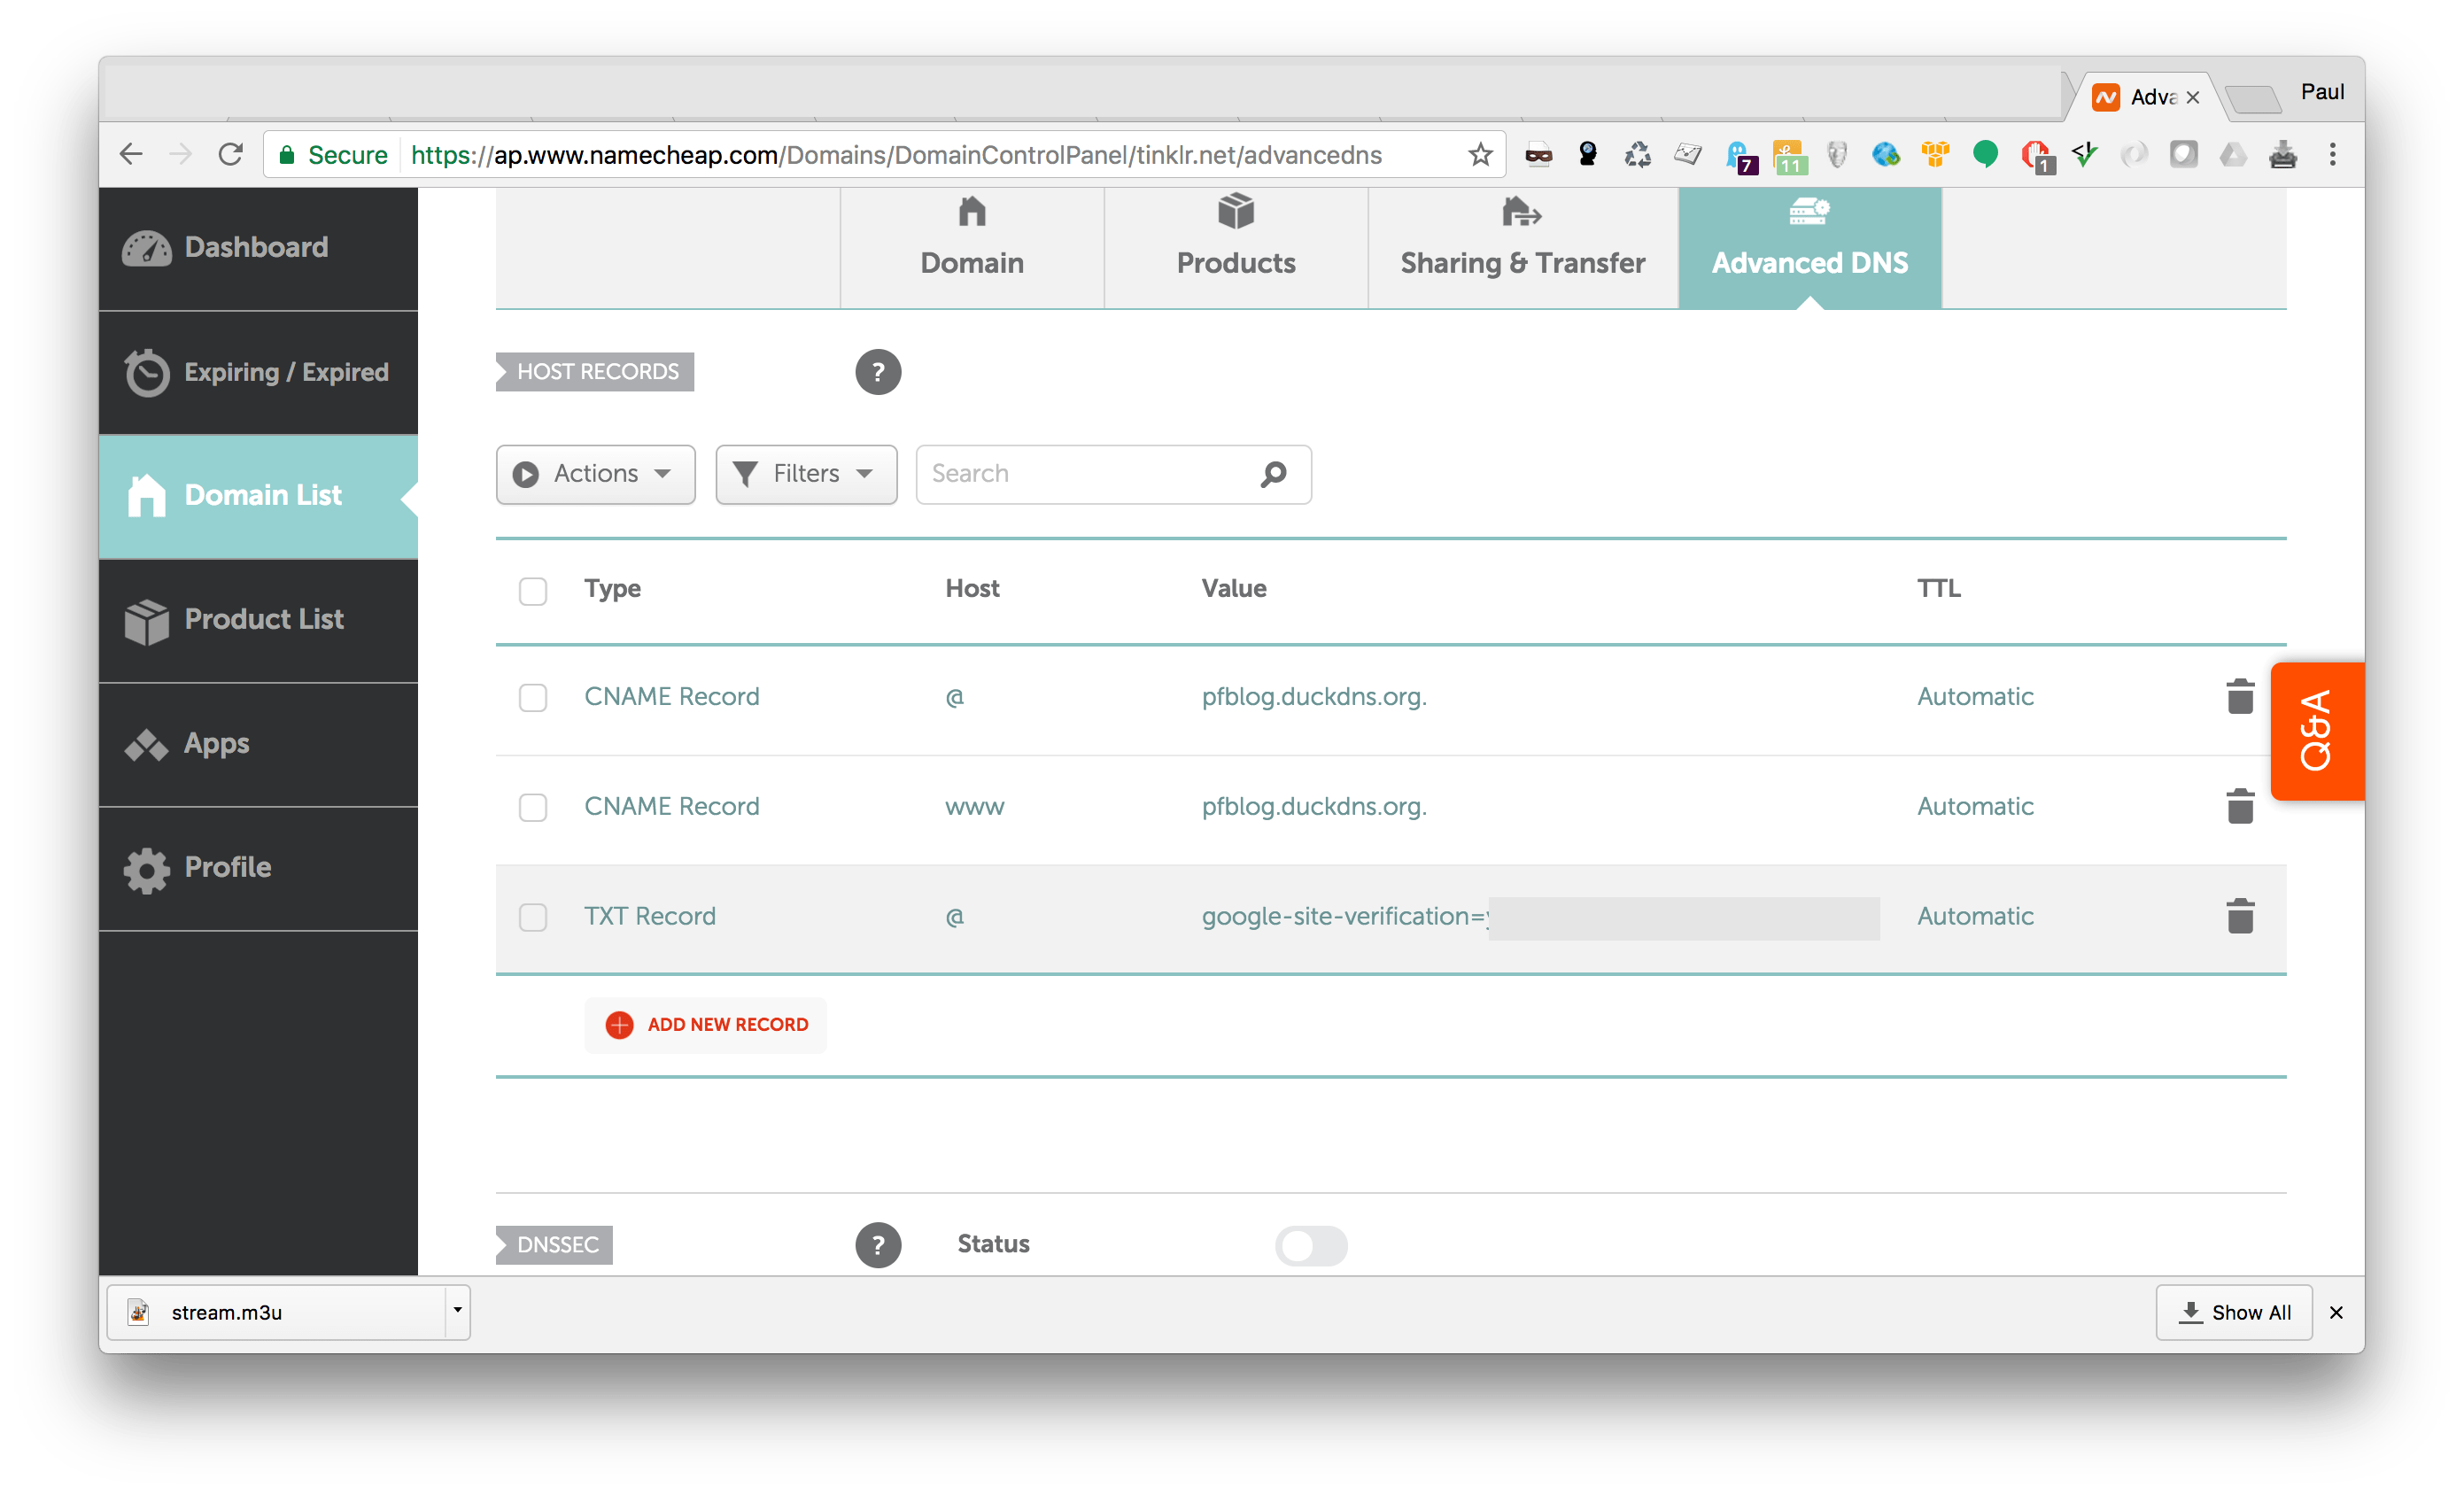
Click on “advanced DNS” and enter the following host records (you can remove any default records under this section):
My records are as follows:
- Type: CNAME Record
- Host: @
- Value: < your dynamic dns address >.
-
TTL: Automatic
- Type: CNAME Record
- Host: www
- Value: < your dynamic dns address >.
- TTL: Automatic
My records are as follows:
- Type: CNAME Record
- Host: @
- Value: pfblog.duckdns.org.
-
TTL: Automatic
- Type: CNAME Record
- Host: www
- Value: pfblog.duckdns.org.
- TTL: Automatic
The third record in the list is my google site verification and is only needed for analytics purposes.
 advanced DNS
If you have completed the nginx setup in this list of tutorials then you should now see your domain responding and returning your content.