Set up a local plane tracker
• 10
minutes read time
• Paul Fearn![]()
In case you hadn’t noticed, I like fiddling with raspberry pis. I also have a son who is rapidly approaching 2 years old. He has an interest in aeroplanes that extends to him shouting “plane” every time a plane flies overhead and, as we live on a flight path, this happens rather often.
I’m starting to enjoy involving myself in my son’s interests, the last one was birds so I guess planes is a natural progression, as a result, I have come up with a project to track the planes that fly overhead and relay information about them back to us.
Around this time I saw some posts about this coming through the subreddit for RTL-SDR. When I read them, I thought they were a little lacking in information so I decided that when I built mine I would try to do a write up with more information.
I’ll be looking to pick up the ADS-B (Automatic Dependent Surveillance–Broadcast) that planes broadcast to share important information like position, velocity and callsign with air traffic control as well as other planes.
Items needed:
- Rapsberry pi (I’ll be using a Pi3)
- RTL-SDR dongle (I’ll be using a NESDR Smart dongle)
- Amazon echo / echo dot (this is optional really and is just a means to consume the information retrieved)
Install packages needed
I decided to back up my image using applePiBaker before starting, just in case anything went wrong. I’ve written a post about this: backing up raspberry pi sd card
I already have git on my pi but if you don’t you should install it:
sudo apt-get install git-core
sudo apt-get install git
Now we need to get the build packages needed to allow us to use the RTL-SDR dongle:
sudo apt-get install cmake
sudo apt-get install libusb-1.0-0-dev
I already had build-essential installed also but in case you don’t:
sudo apt-get install build-essential
Install drivers for the RTL-SDR dongle
Now we need to install the drivers for the dongle:
git clone git://git.osmocom.org/rtl-sdr.git
cd rtl-sdr
mkdir build
cd build
cmake ../ -DINSTALL_UDEV_RULES=ON
make
sudo make install
sudo ldconfig
If you received nothing back from the last command (sudo ldconfig) then all should be well.
Plug the dongle in
Some further set up of the dongle to tell the system what the device can do followed by a quick reboot:
cd ~
sudo cp ./rtl-sdr/rtl-sdr.rules /etc/udev/rules.d/
sudo shutdown -r now
When the system comes backup, it’s time to see if the driver is working ok
rtl_test -t
You will most probably see an error that looks like the following:
 Message displayed after test
If you do see this message, continue as it is showing that the device has been found.
Install Dump1090
There are some forked versions of Dump1090 that will display any data on a map for you but some of them look a little heavyweight for this. I’m looking for something a little more lightweight for this project. If you would like the plotting and mapping option, I would recommend maybe using this fork of dump1090 although the version that I’m going to use will offer a very lightweight version of mapping anyway.
The version that I will be using for this project is:
https://github.com/antirez/dump1090
cd to where you want the dump1090 software installed first (I’ve gone with the home directory)
cd ~
git clone git://github.com/antirez/dump1090
cd dump1090
make
To test your new install:
./dump1090
At this point you may see another error that is related to the previous error:
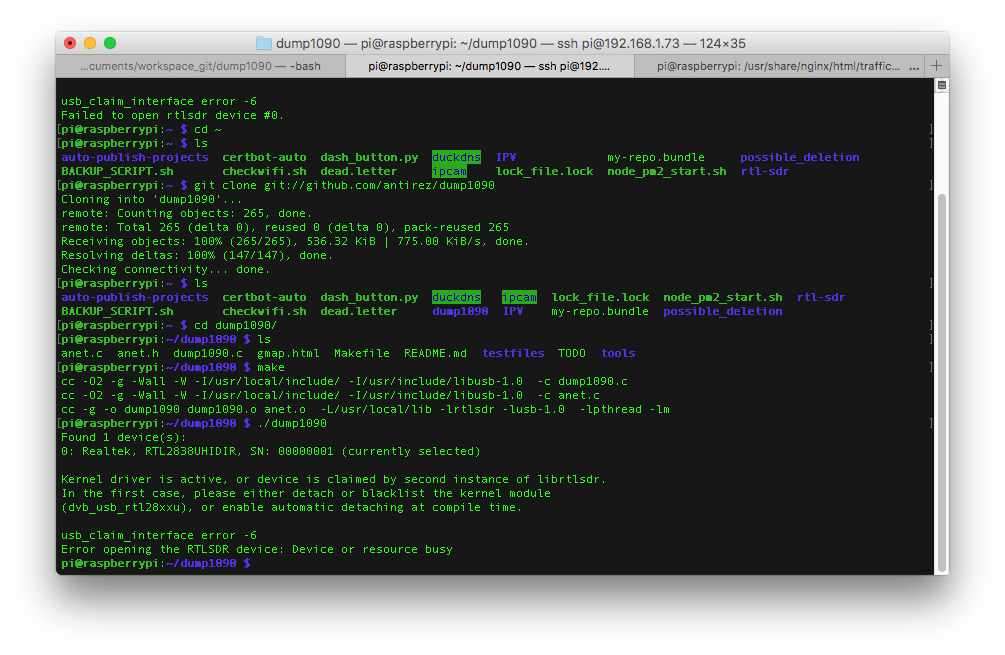 New error
This is saying dvb_usb_rtl28xxu is already using the device. You can temporarily unload this module:
sudo rmmod dvb_usb_rtl28xxu
Or permantly remove it with a blacklist entry in /etc/modprobe.d – add a new file here named something like rtl-sdr.conf, add add one line with the name of the above driver:
blacklist dvb_usb_rtl28xxu
After implementing either of these (blacklisting will require a reboot), try running dump1090 again
./dump1090
After a brief moment you should see some information about any planes in your area whizzing by:
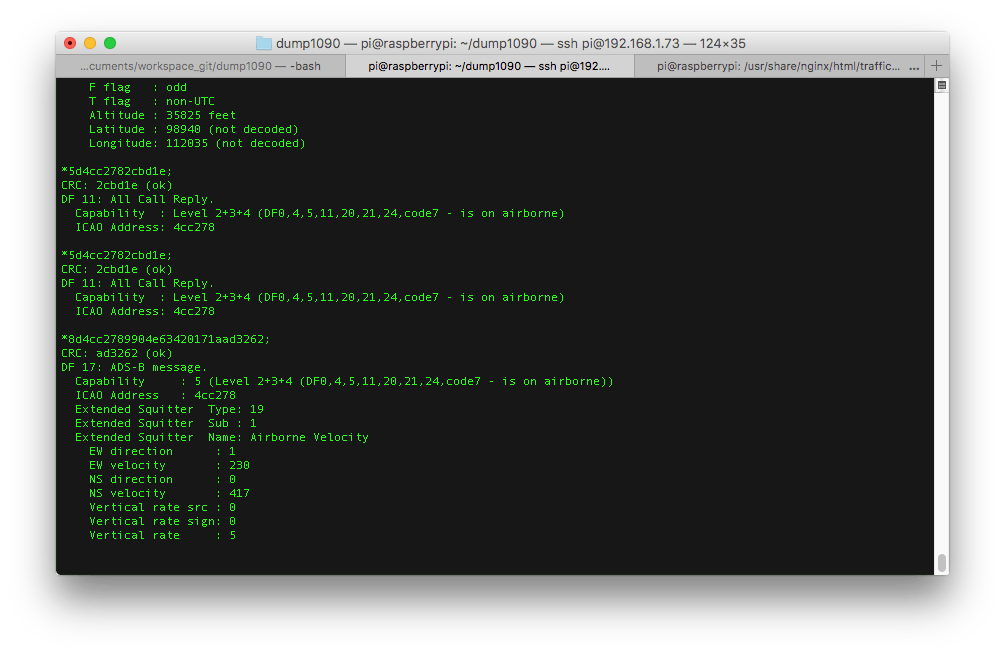 Plane details near to me
You can run dump1090 in different modes, I decided to check out the interactive networked mode:
./dump1090 --interactive --net
This will start to show you the details in a more readable format in the terminal:
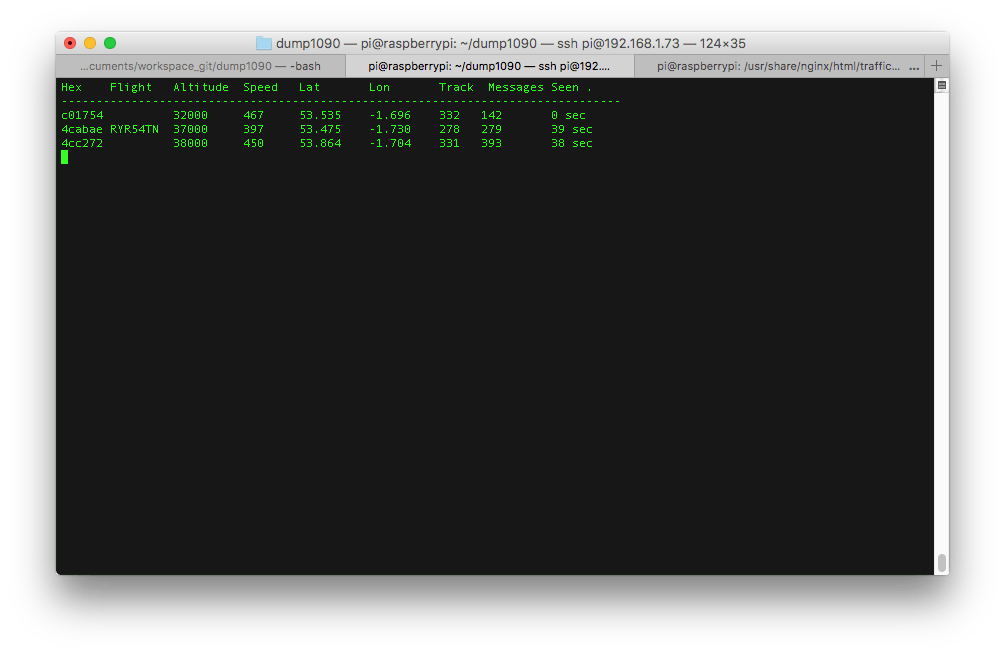 Terminal details
It will also fire up a little server for you to be able to see the planes on a map. It can be accessed via your ip address and the default port number (8080)
Note, I had to change the port number to be 9090 as I already had Jetty running on 8080. I did this by editing the dump1090.c file so that the #define MODES_NET_HTTP_PORT 8080 was changed to #define MODES_NET_HTTP_PORT 9090. I then recompiled via make and re-ran the script.
 Interactive map
Now try going to http://your-ip-address:8080/data.json and you should see a json output of the information you can see in your terminal. This is the service we will call in our node service to get the basic information about aircraft in our area.
Now we have proven that the aerial works and that we can see some aircraft information.
Install node
curl -sL https://deb.nodesource.com/setup_7.x | sudo bash -
apt-get install nodejs
Verify the installation with node -v
Create node service
I don’t want to go fully into this part as I think it will take too long. Essentially I built a restful api that plugs into other apis to scrape some information about each flight. I’ll add the code to my github for anyone who wants to take a look but the flow is something like this:
- Accept GET request
- Get json response from dump1090 (http://your-pi-ip:9000)
- Parse HEX and call sign
- Use hex and call sign with further API requests:
- https://ae.roplan.es/api/hex-type.php?hex=
- https://ae.roplan.es/api/hex-reg.php?hex=
- https://ae.roplan.es/api/hex-airline.php?hex=
- https://ae.roplan.es/api/callsign-route.php?callsign=
- https://ae.roplan.es/api/IATA-airport.php?iata=
- https://ae.roplan.es/api/IATA-airport.php?iata=
- https://ae.roplan.es/api/hex-type.php?hex=
- Parse the results and send response back
Invoke with alexa
This feels like it could be a post on it’s own, and maybe it will be in the future, but for now I’ll have a go at covering it here.
This service will require access to your pi. I have covered using a dynamic dns with the pi before so I won’t go into that here. In case you need some help with port forwarding and dynamic dns:
set up duckdns (my dynamic dns provider of choice)
Set up router to forward requests
Right, back on with the post. You’ll need an amazon developer account developer.amazon.com and an AWS account aws.amazon.com. These are both available for free from amazon but be careful with the AWS account as not every service behind aws is free. In this case we will be using a lambda function that will remain free as we aren’t publishing our skill because it’s just for personal use (I doubt that we’ll breach any limits on our own).
Create lambda function
Go to aws.amazon.com and select Lambda under services
 Create Lambda function
Select Create function
 Create Lambda function
Select Author from scratch
 Create from scratch
Add Alexa Skills Kit for the trigger
 Add trigger
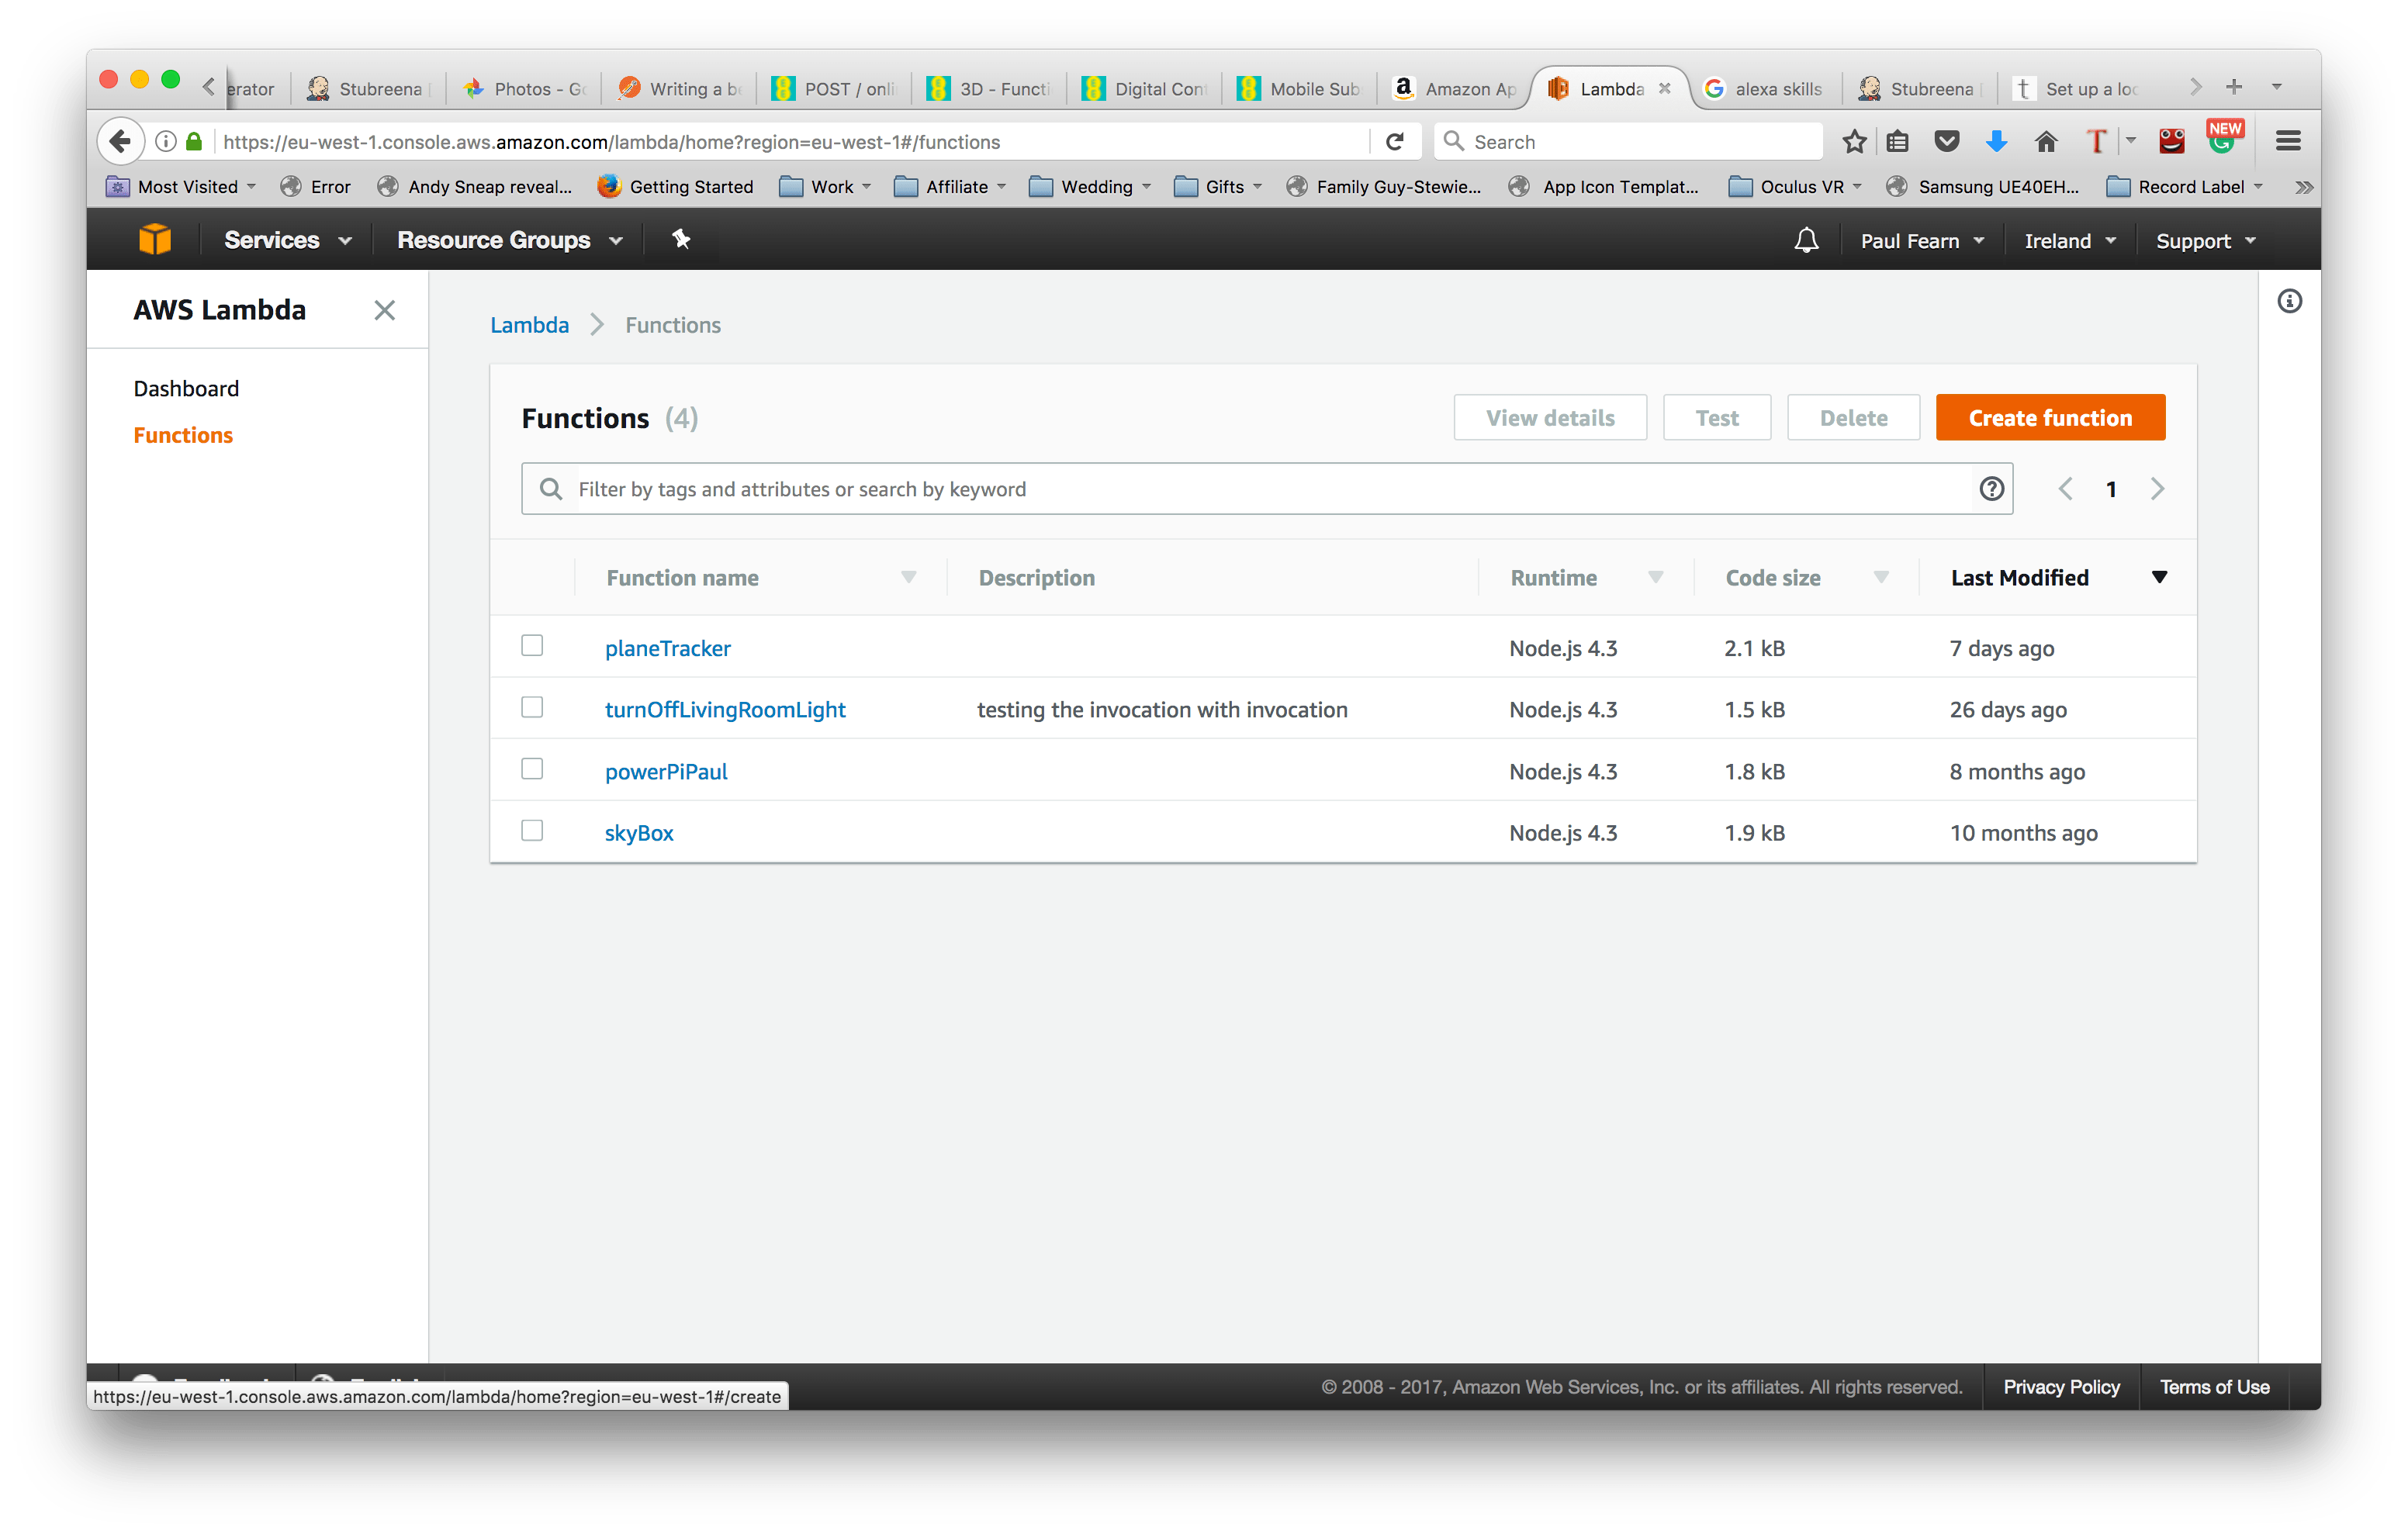
Name your function and write a description, I called mine “planeTracker”. Select Node.js 4.3 (this is just because I’ve worked with 4.3 with my last skill that I wrote)
 planeTracker
You may need to create a role if you haven’t before, you should be able to create a basic execution role from the templates as I have done in the past
 Create a role if needed
Make a note of the ARN we will use this when we are creating our alexa skill. The code for this lambda function is available on my github repo so I won’t copy and paste it here. At the time of writing, the script that I have written is somewhere between a proof of concept and a finished script. You may notice some placeholders for future work (I intend to have a response in the future that will give back more information if the user requests it).
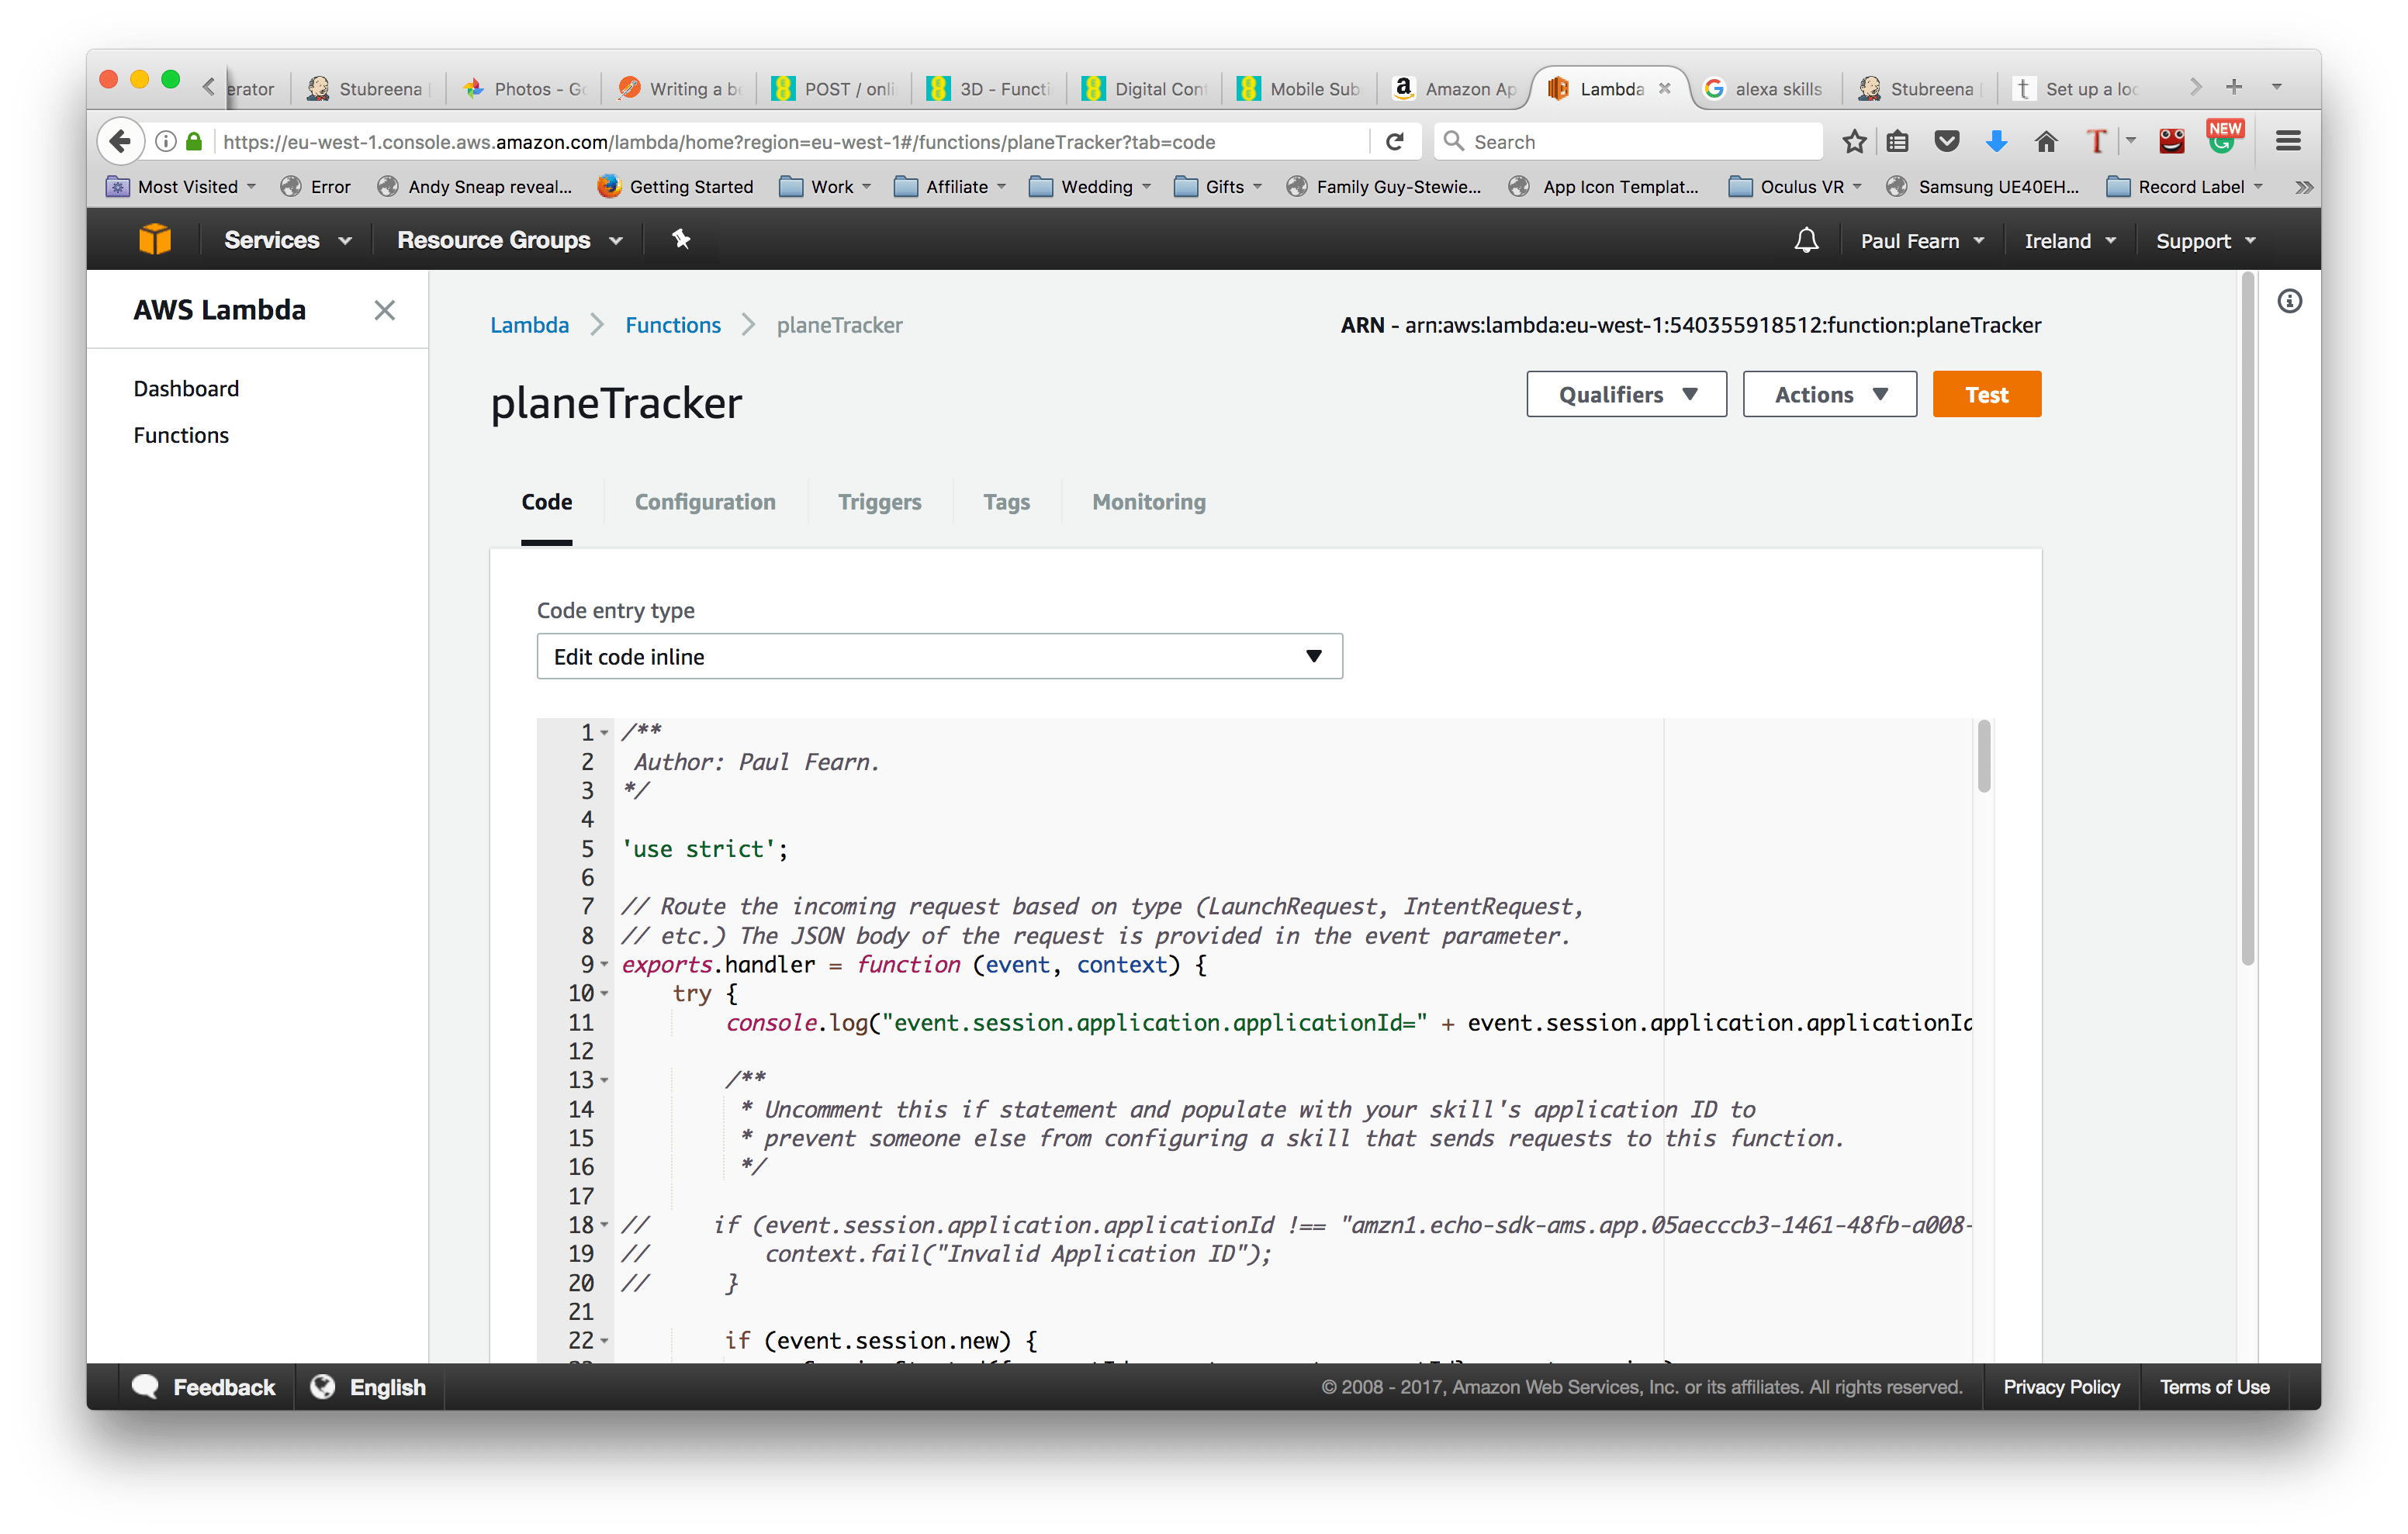 ARN
ARN
Create the Alexa skill
Go to developer.amazon.com and select “get started” under Alexa Skills Kit*
 Skills kit
Select Add a New Skill
 New skill
Select the following items under Skill information
- Skill Type = Custom Interaction Model
- Language = English UK (This may be different for you, but not that different as the only other options, at time of writing, are US and German)
- Name = Plane Tracker
- Invocation Name = plane tracker
- Audio Player = No
- Video App = No
- Render Template = No
Hit save and then next
 Save
Save
My intent schema is as follows:
{
  "intents": [
    {
      "intent": "GetFlights"
    }
  ]
}
This GetFlights intent is linked to the intent that I have in my lambda function.
 GetFlights intent
I haven’t created any custom slot types. My sample utterances are as follows:
GetFlights what plane is that
GetFlights what flight is that
GetFlights which flight is that
GetFlights which plane is that
These utterances will trigger the intent above
 Sample utterances
Next up is the configuration
Select AWS Lambda ARN as the service end point, my geographical region is Europe but again yours may be different. Under these two is where we link the ARN that we saw earlier and I’ve left account linking as No.
 configuration
Now we can move on to test.
Enter a sample utterance from the list and click Ask Plane Tracker. You should see the response come back and you can listen to it by clicking the Listen button
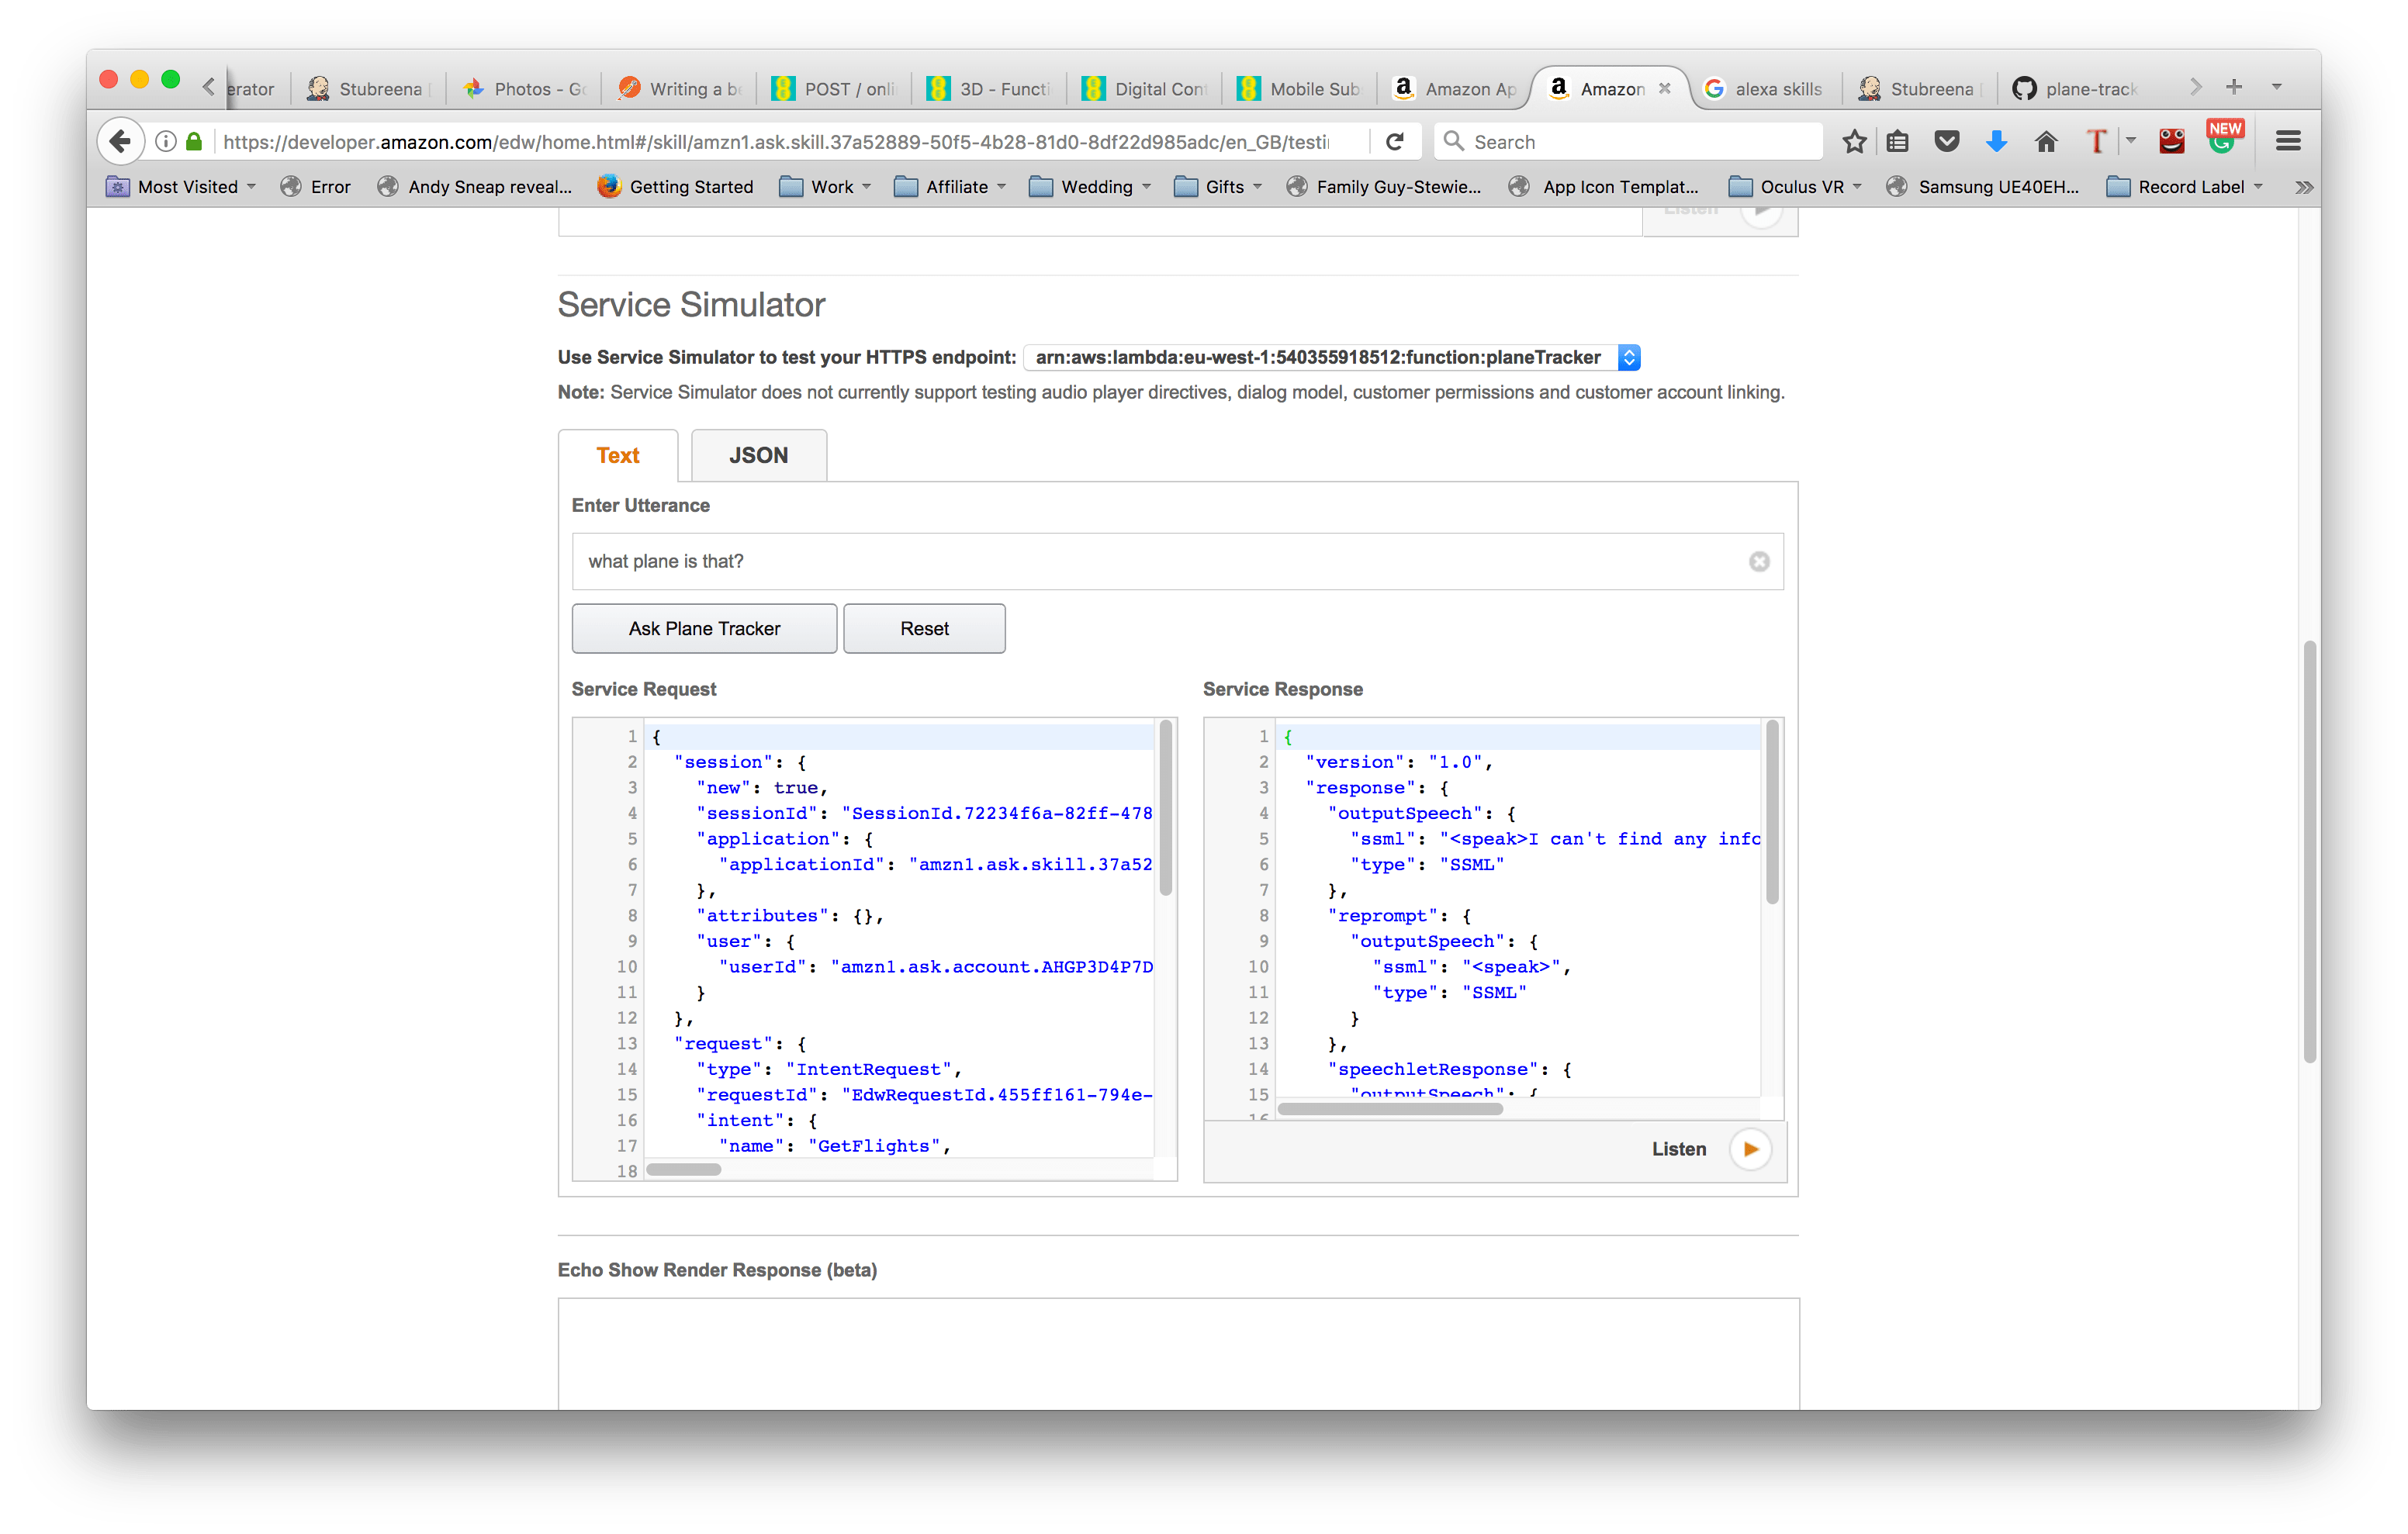 Test
Test
You should find that your test app is automatically installed on your alexa account so you can invoke it using you Amazon Echo. Let me know how you get on and if you spot any glaring holes in the write up.